asmita’s hollywood trousers: getting the perfect fit
We are incredibly proud of Asmita, who bravely tackled her fears and successfully sewed a perfectly fitting pair of classic Hollywood Trousers. Her journey is nothing short of inspiring, and we hope her story encourages others to take on similar challenges!
When I joined the Advisors Circle, I set a personal goal to focus on achieving the perfect fit this year. I’ve always admired the Hollywood Trousers pattern, so at the end of last year, I volunteered to sew a pair for a blog post, even though it’s a three-star pattern and I’m still relatively new to sewing.
To be honest, there were moments when I almost gave up. As the deadline approached, everything—from selecting the right fabric to understanding the instructions—felt overwhelming. However, I pushed through, and I’m thrilled to share my finished trousers with you today.
I decided to document my journey in this post, hoping it might help other beginners tackle complex patterns like mine, which ultimately led to a rewarding outcome.
Measurements, Sizing, and Adjustments
Given my lack of experience with fly zippers and my general zipper anxiety, I knew I needed to create a muslin or two. Although I didn’t discover Liesl’s muslin-making guide until after my first attempt, I followed her advice and made a muslin with the pocket piece and fly zipper included.
With a waist measurement of 30 inches and hips of 39 inches, standing at 5’4â€, I initially cut a straight size 8. I debated cutting a size 10 at the waist due to my tendency to make larger toiletries, but I decided to stick with the size 8. Based on my measurements, I adjusted the front and back rise by 1/2 inch and shortened the pant length by 1 1/2 inches.
The Muslin Stage
You can see the results of these changes in the muslin photos. While the waistband felt slightly snug, I remained convinced that moving up a size wouldn’t solve my fit issues. Additionally, I realized the pants billowed too much below my hip line, so I narrowed the inseam by 1/2 inch and tapered the outseam by the same amount from the hem to the hip notch. These changes were mostly undone in the final version.
In my second muslin, I created short shorts to troubleshoot the zipper issue. I finally nailed it by carefully studying the diagrams, particularly items 8 and 9 under “Sew a zipper fly.â€
I also addressed the snug waist by making the following changes to my final trousers:
- Reducing the width of the back dart by bringing in each foot by 1/8 inch.
- Narrowing the outseam seam allowance to 3/8 inch from the waist to the hip notch.
- Slightly reducing the seam allowance on the back rise.
These adjustments provided about 1 inch of additional waist circumference, so I extended the waistband accordingly. Interestingly, I didn’t transfer these changes to my pattern pieces, which proved beneficial later on.
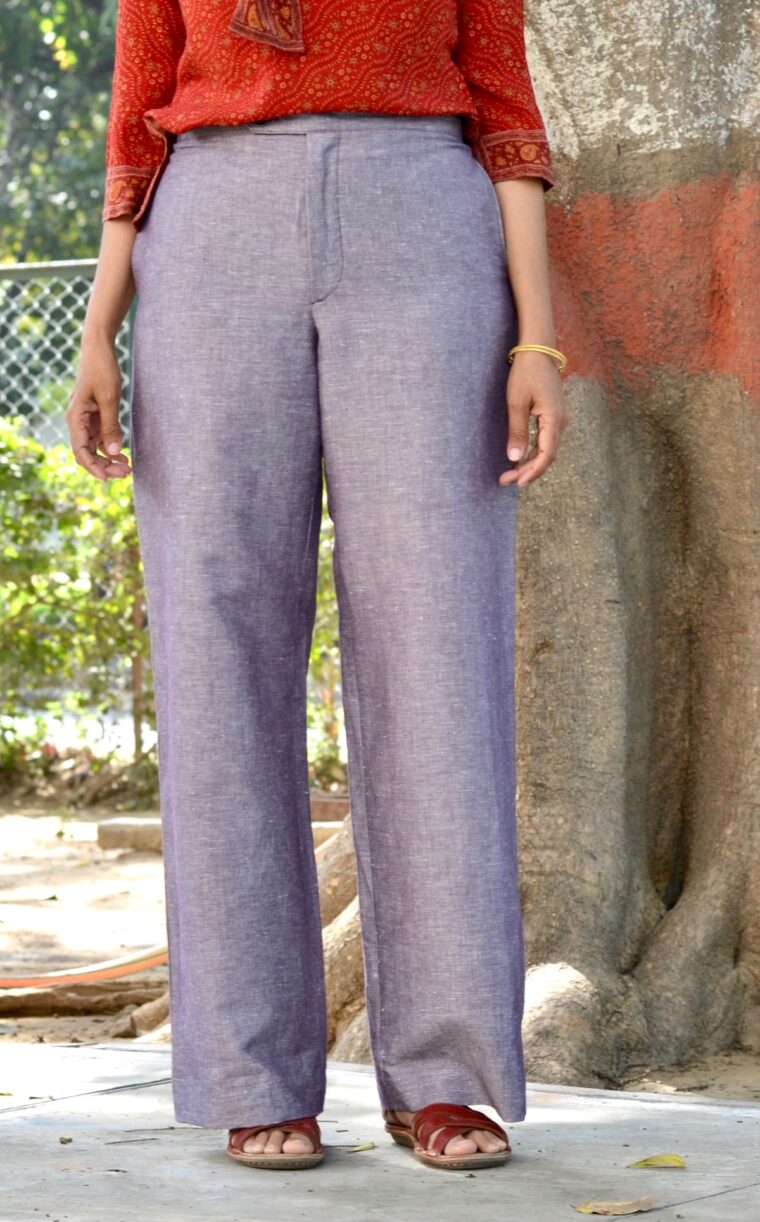
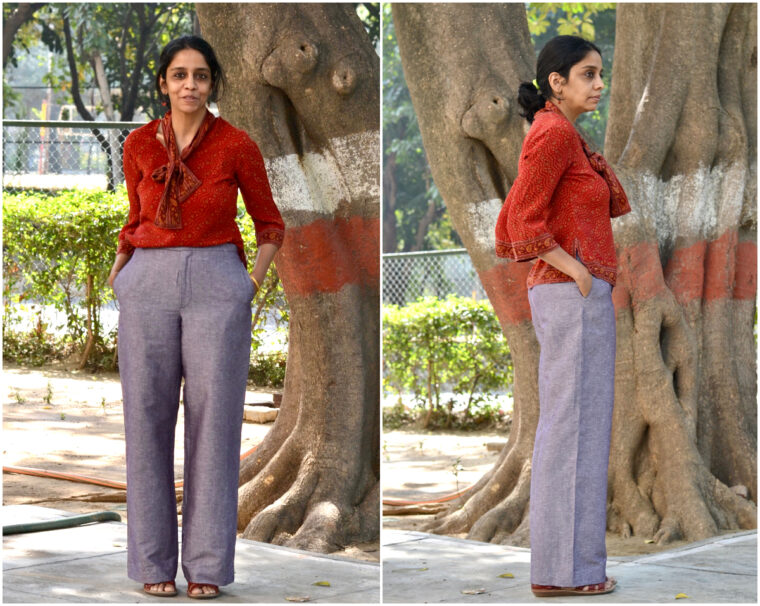
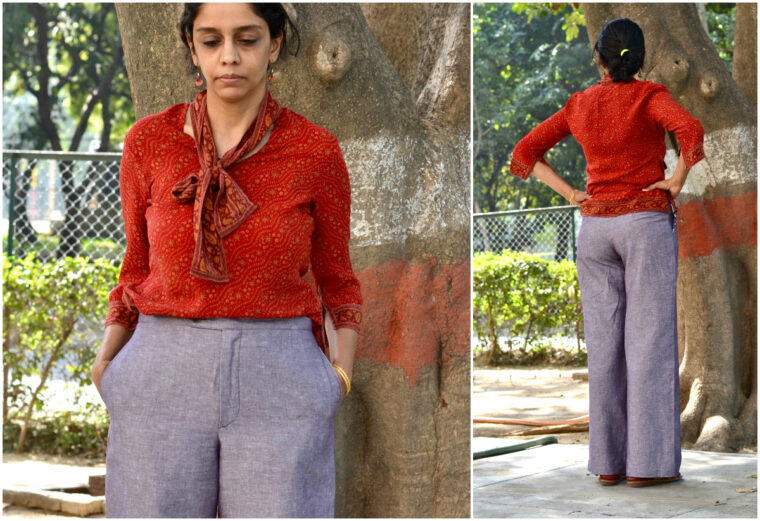
Final Version
With all these adjustments in mind, I felt more confident and ready to cut into my chosen fabric. Drumroll, please! Here are my finished trousers, size 8 with the above alterations to increase the waist circumference and a 2-inch hem. They look great paired with my favorite silk blouse.
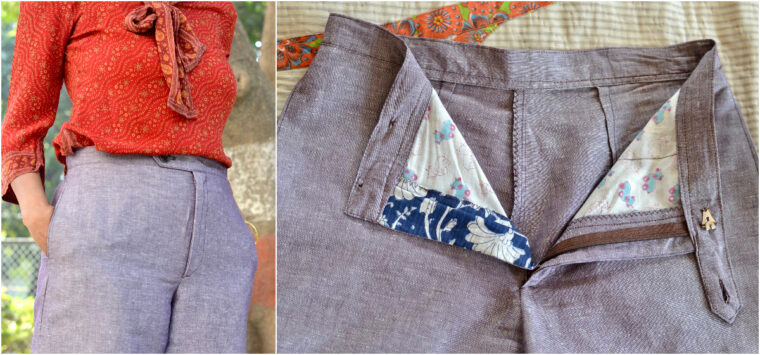
I’m particularly pleased with how the zipper turned out. Mastering these techniques marked a significant milestone in my sewing journey.
About the fabric: The cotton-linen blend I used comes from H.P. Singh in Nehru Place, Delhi. Initially, I was nervous about choosing a fabric lighter than recommended, but a knowledgeable salesperson guided me toward something suitable for Delhi’s climate. While I was skeptical, the fabric turned out to be perfect for the upcoming summer. Moreover, I didn’t need to alter the leg width as I did in my muslin.
The pants feature a 3/8-inch outseam seam allowance above the hip notch and taper to a 5/8-inch allowance below. For the inseam, I began with the standard 1/2-inch allowance and increased it to 5/8 inch at the crotch.
Matching the zipper color was another challenge. Through this project, I learned that 9-inch pant zippers come in limited colors and often need dyeing to match.
That concludes my trouser-sewing adventure for now. It feels incredible to learn something new, and I hope this inspires others hesitating to take the plunge. The Oliver + S blog offers numerous helpful posts, and there’s even a trouser sew-along for beginners like me.
For me, this isn’t the last pair of Hollywood Trousers I’ll make. There are still a few tweaks I’d like to explore, such as trying a size 10 waist to compare fits. Despite these minor issues, I’m thrilled with the outcome. Thank you, Liesl, for creating such an amazing pattern and providing excellent instructions!
(adsbygoogle = window.adsbygoogle || []).push({}); Â
--- I hope this version meets your requirements!
our Spinning oil is mixed with Oil and surfactant, it is necessary in the process of spinning, could reduce the friction and static.
based on different yarn, we have POY, FDY, DTY Oil.
Function: Increase the strength of the oil film, reduce the occurrence of defects, reduce the yarn breakage rate, improve the spinning quality, make the processing of the subsequent yarns smoother, the dyeing is more uniform, and the coking and yarn breakage problems in the subsequent processing are significantly reduced.
In high-speed spinning, the oil can reduce the friction damage of the silk and reduce the disturbance caused by static electricity.
spinning oil, Filature oil, POY oil, FDY oil, DTY oil
NINGBO LUCKY CHEMICAL INDUSTRY CO., LTD , https://www.chinaluckychem.com